 Here is a peak at the Halloween scene I made in our dining room. As you can see this year the theme is Ghostly Forest. I got the idea for the spooky sideboard twigs from a Halloween magazine. Only the magazine idea didn't have lighted branches and decorated pots. I decided to put my own spin on it/I wanted my twigs to be lighted and create a glow. Here is the finished project.
Aaron is standing in the Ghostly Forest. Appropriately titled since I have glowing ghosts in specimen jars and ghostly apparitions hanging from the ghostly trees. LOL

Along with the ghostly sideboard...I also decided to make a bigger twig tree for the corner next to the sideboard. I knew the sideboard twigs would be too small to hold ghostly trinkets...so i wanted to build a bigger tree to hold all the ornaments and treat buckets. Turned out really cool.....and it was a fun project. it's so simple and easy and a good cheap way to add flair for your Halloween parties. We had alot of storm damage this summer. So there was no shortage of down tree branches in our woods. So I grabbed some twigs......and here is how I made the ghostly forest.
 First, I bought some plain terra cotta pots(the big tree I already had a plastic old flower pot laying around...so use whatever you can...reusing something old is good). My hubby helped me secure the twigs into the pots with cement. yes, we cemented them in-lol! After the cement dried.....I spray painted the whole branches and pots BLACK. I used glossy spray in can from Micheal's. It dries quickly.....after it was dry. I put small lights around the branches and secured them with black wire ties(from hardware store). I have about 4 light sets on each twig pot. I used lights from Micheal's that had a combo of Orange and purple lights on the strand. The strand was only 3o lights on string. Which was nice so I could use each strand to wrap a branch and not have so much string to deal with. I did it that way so I could have less string showing......I wanted it to be snug to the branch and not have light string hanging everywhere. It's not a big deal just depends on what look your going for.
 After I was done with the lights.....I added Scrapbook supplies to the pots. The green spiderweb ribbon trim, and the 3D foam stickers. Super Easy!
 A look at the BOO twigpot.
 Here is the bigger twig tree.....base. I already had this flowerpot in the garage. So I painted it black too and added bigger scrapbook ribbon as trim and just the 3D bat stickers. I even put a little word ribbon at the base. I was going to put some spanish moss to cover the cement BUT found this shiny, synthetic purple spider web did the trick instead. Looks kinda like colored spanish moss and it was much easier to deal with. I just bunched it up and put it over the cement. Gave it a little color punch with the black and white twigpots.
Can't wait to have our annual Halloween Dinner Party in the Ghostly Forest! Aaron is super excited about it as he helped me alot with our spooky forest. Here is a closer look at all the ghostly apparitions on the big Spooky forest Tree.


 Bought the felt ghost and pumpkin at Pier 1 imports. I thought they would be perfect and Lightweight for my ghostly tree. If you push them in the middle their eyes light up(the ghost makes eerie noises, and the pumpkin says happy Halloween). Aaron likes to push the button ALOT! hee
I bought the mini treat bucket(also light weight) from pottery barn kids. Added them to the hanging branches. I love the owl.....he's so cute! The treat buckets were super cute but I noticed going real real fast at PBK. I ordered early and they were on back order.
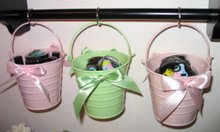
Than I added some buckets from the dollar bin at Target. The tin buckets are little heavier, and don't work as well. Note to get lighter stuff for twigs. LOL
This was a fun project that I will have to copy every year now. Making the dining room a spooky haunting .....and eerie glow of the Ghostly Forest.


1 comment:
Hi Paulene! Thanks for dropping by my blog! You did a great job with the branches and I love the lit up ghosts in the jar! For a moment there, your son looked like a ghost himself-hovering in that corner..lol! The jack-o-lantern burger looked yummy too!
Happy Hauntings!
Sandy
Post a Comment